
In laboratories, the centrifuge is a relatively frequent separating equipment. It is frequently employed in the separation of experimental materials in sectors such as biomedicine, petrochemistry, agriculture, food hygiene, and others. Since its inception, the lab centrifuge has undergone low-speed, adjusted-speed, and over-speed modifications. Its advancement is primarily represented in the two complementary elements of centrifugal equipment and centrifugal technology. In terms of rotation speed, desktop centrifuges fall into two categories: low-speed and high-speed centrifuges. The advent of general-purpose desktop centrifuges has blurred the distinctions between low-speed, high-speed, micro-volume, and large-capacity centrifuges. Numerous rotors offer scientific researchers a wide range of applications. The scope of application has become the top choice for scientific research institutes.

How to use a Benchtop Low-Speed Centrifuge
1.The benchtop low-speed centrifuge is set up on a level table or platform. The four rubber feet should be securely planted on a flat surface. Check for balance visually. Shake the centrifuge gently by hand to ensure that it is properly positioned.
2. Place the centrifuge tube into the rotor body after opening the door. The centrifuge tube must be in even-numbered symmetry (the centrifuge tube test solution must be weighed and added). Pay close care to tightening the screws on the rotor body, and double-check that the test tube is symmetrically placed and that the screws are tightened.
3. Close the door cover, make sure it's locked, and then check to make sure it's closed tightly.
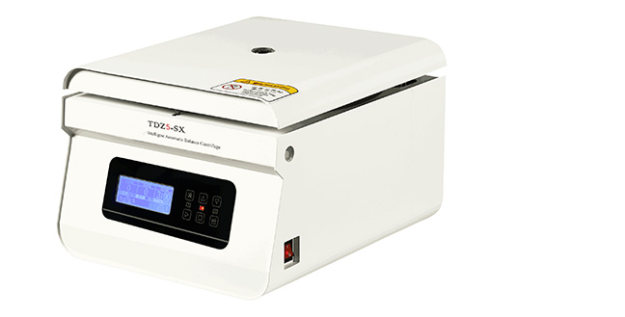
4. Plug in the power adapter and turn on the power switch.
5. Configure the rotor number, speed, temperature, and time.
In the stopped state, the user can set the rotor number, speed, temperature, and time by pressing the SET button; in the running state, the user can only set the rotation speed, temperature, and time by pressing the set (SET) button; the centrifuge is in the setting state at this time, the running light is on, and the stoplight is flashing (in the stopped state, press the "SET" key to switch between timing modes). Cycle selection (in the running mode, press the "SET" key to cycle through time, temperature, and speed).
Set the rotor number as follows: When the decimal on the lower right corner of the rotor digital tube lights up, it will enter the rotor number setting, and then press the "" or "" key to select the centrifuge's rotor number this time. There are six different types of rotors to choose from. Note that the rotor number must be consistent with the rotor selected, and no errors can be set.
1.Set the speed: press the "SET" key until the decimal in the lower right corner of the last digital tube of the speed lights up, and then press the "" or "" key to determine the speed of the centrifuge at this time.
2.Set temperature: Press the "SET" key; when the decimal in the lower right corner of the final digital tube lights up, the temperature setting is entered; then press "" or "" to determine the centrifuge's operating temperature.
3.Set time: Press the "SET" key, and when the decimal in the bottom right corner of the final digital tube lights up, it will enter the time setting. Then, press the "" or "" key to ascertain the centrifuge's current working time (the longest time is 99 minutes), and the time counts down.
4.After completing the preceding four stages, hit the "ENTER" key again to confirm the rotor, speed, temperature, and time settings, and then press the "START" key to start the centrifuge.
5.When the rotor comes to a halt, open the door and remove the centrifuge tube.
6.Turning off the power switch turns off the centrifuge.
Precautions for the use of the centrifuge
The rotor cover can be put on the centrifuge platform or the experimental table while the Benchtop Refrigerated Centrifuge is pre-cooling. Make sure it's tight and floats on the rotor, because if it starts by accident, the rotor cover will fly out and cause an accident.
When the centrifuge produces a noise or vibrates, the power should be turned off immediately and the issue should be corrected as quickly as feasible. To prevent the machine from vibrating, the centrifuge tube must be symmetrically inserted in the shell. If only one sample tube is available, the other should be replaced with water of comparable quality.
The centrifuge is simple to use and has no technical content, proper use and maintenance are still required. When an experiment fails, it causes a delay that is not worth the loss.
